
How to paint an acrylic bath - Easy DIY Bathroom Project
If you love the look of a bespoke painted bath but don’t want the hefty price tag of a cast iron one, painting an acrylic bathtub is a really easy and affordable way of achieving the same look. We painted our new bath as part of our bathroom renovation which you can see below but if you want to give your current bathroom a bit of a refresh in an affordable way, painting an old bathtub is a great budget-friendly option.
Our bathroom project

Before
Our bathroom is quite a small space and as you can see, it hadn't been updated in years! There was a long vanity unit which took up a lot of room along the left wall, and an airing cupboard at the end of the bath on the opposite side which stored an old hot water cylinder that we no longer needed. We ripped both of these out which gave us so much more useable space.
What we did
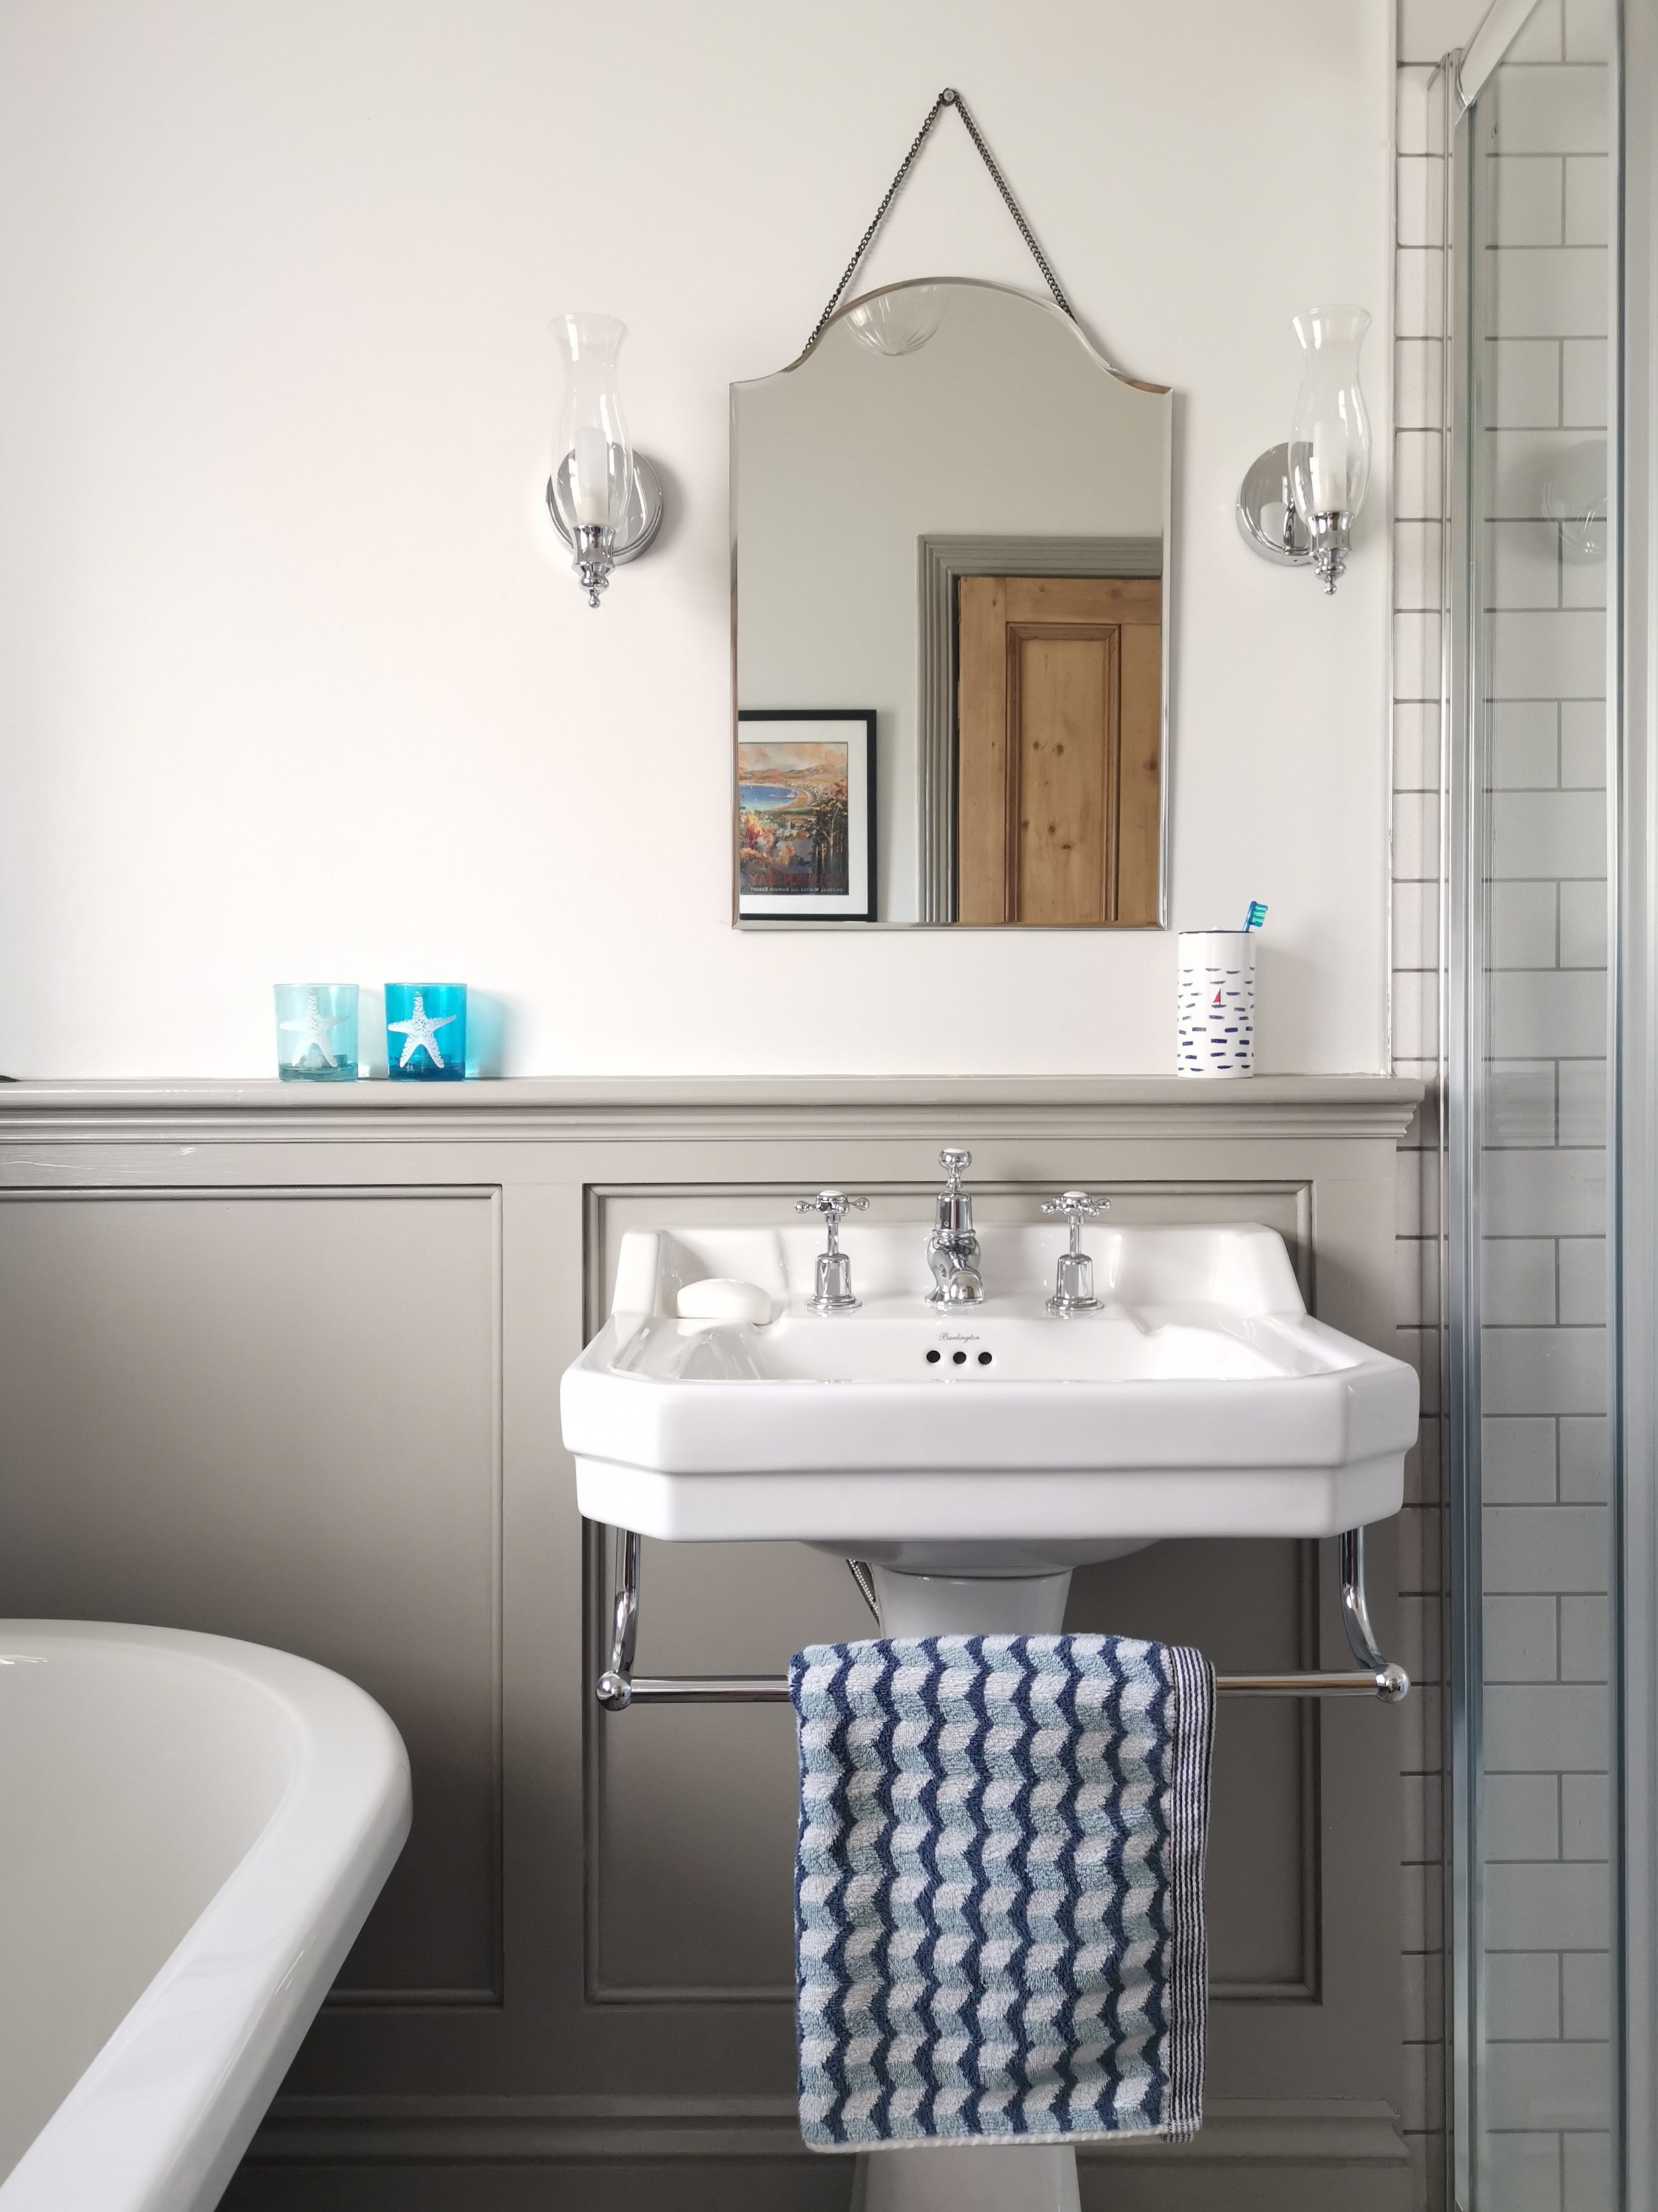
I had already decided that I wanted a classic look for this bathroom. We added panelling to the bottom of the walls for a traditional feel and for extra storage. The basin is from Burlington's Edwardian range to tie in with the era of the house. It's really practical because it comes with a small upstand which helps to prevent splashes at the back of the basin - a great idea if you've got young boys! There was the option of a washstand but I preferred the look of a pedestal here, and the pedestal option was much cheaper.

I chose ceramic tiles from Fired Earth's Trellis range. They work well with the classic style of the bathroom while adding an interesting, contemporary twist. And how lovely is the radiator?! As I’ve said before, one of the best things you can do for a period house is to install a lovely cast iron radiator like this.
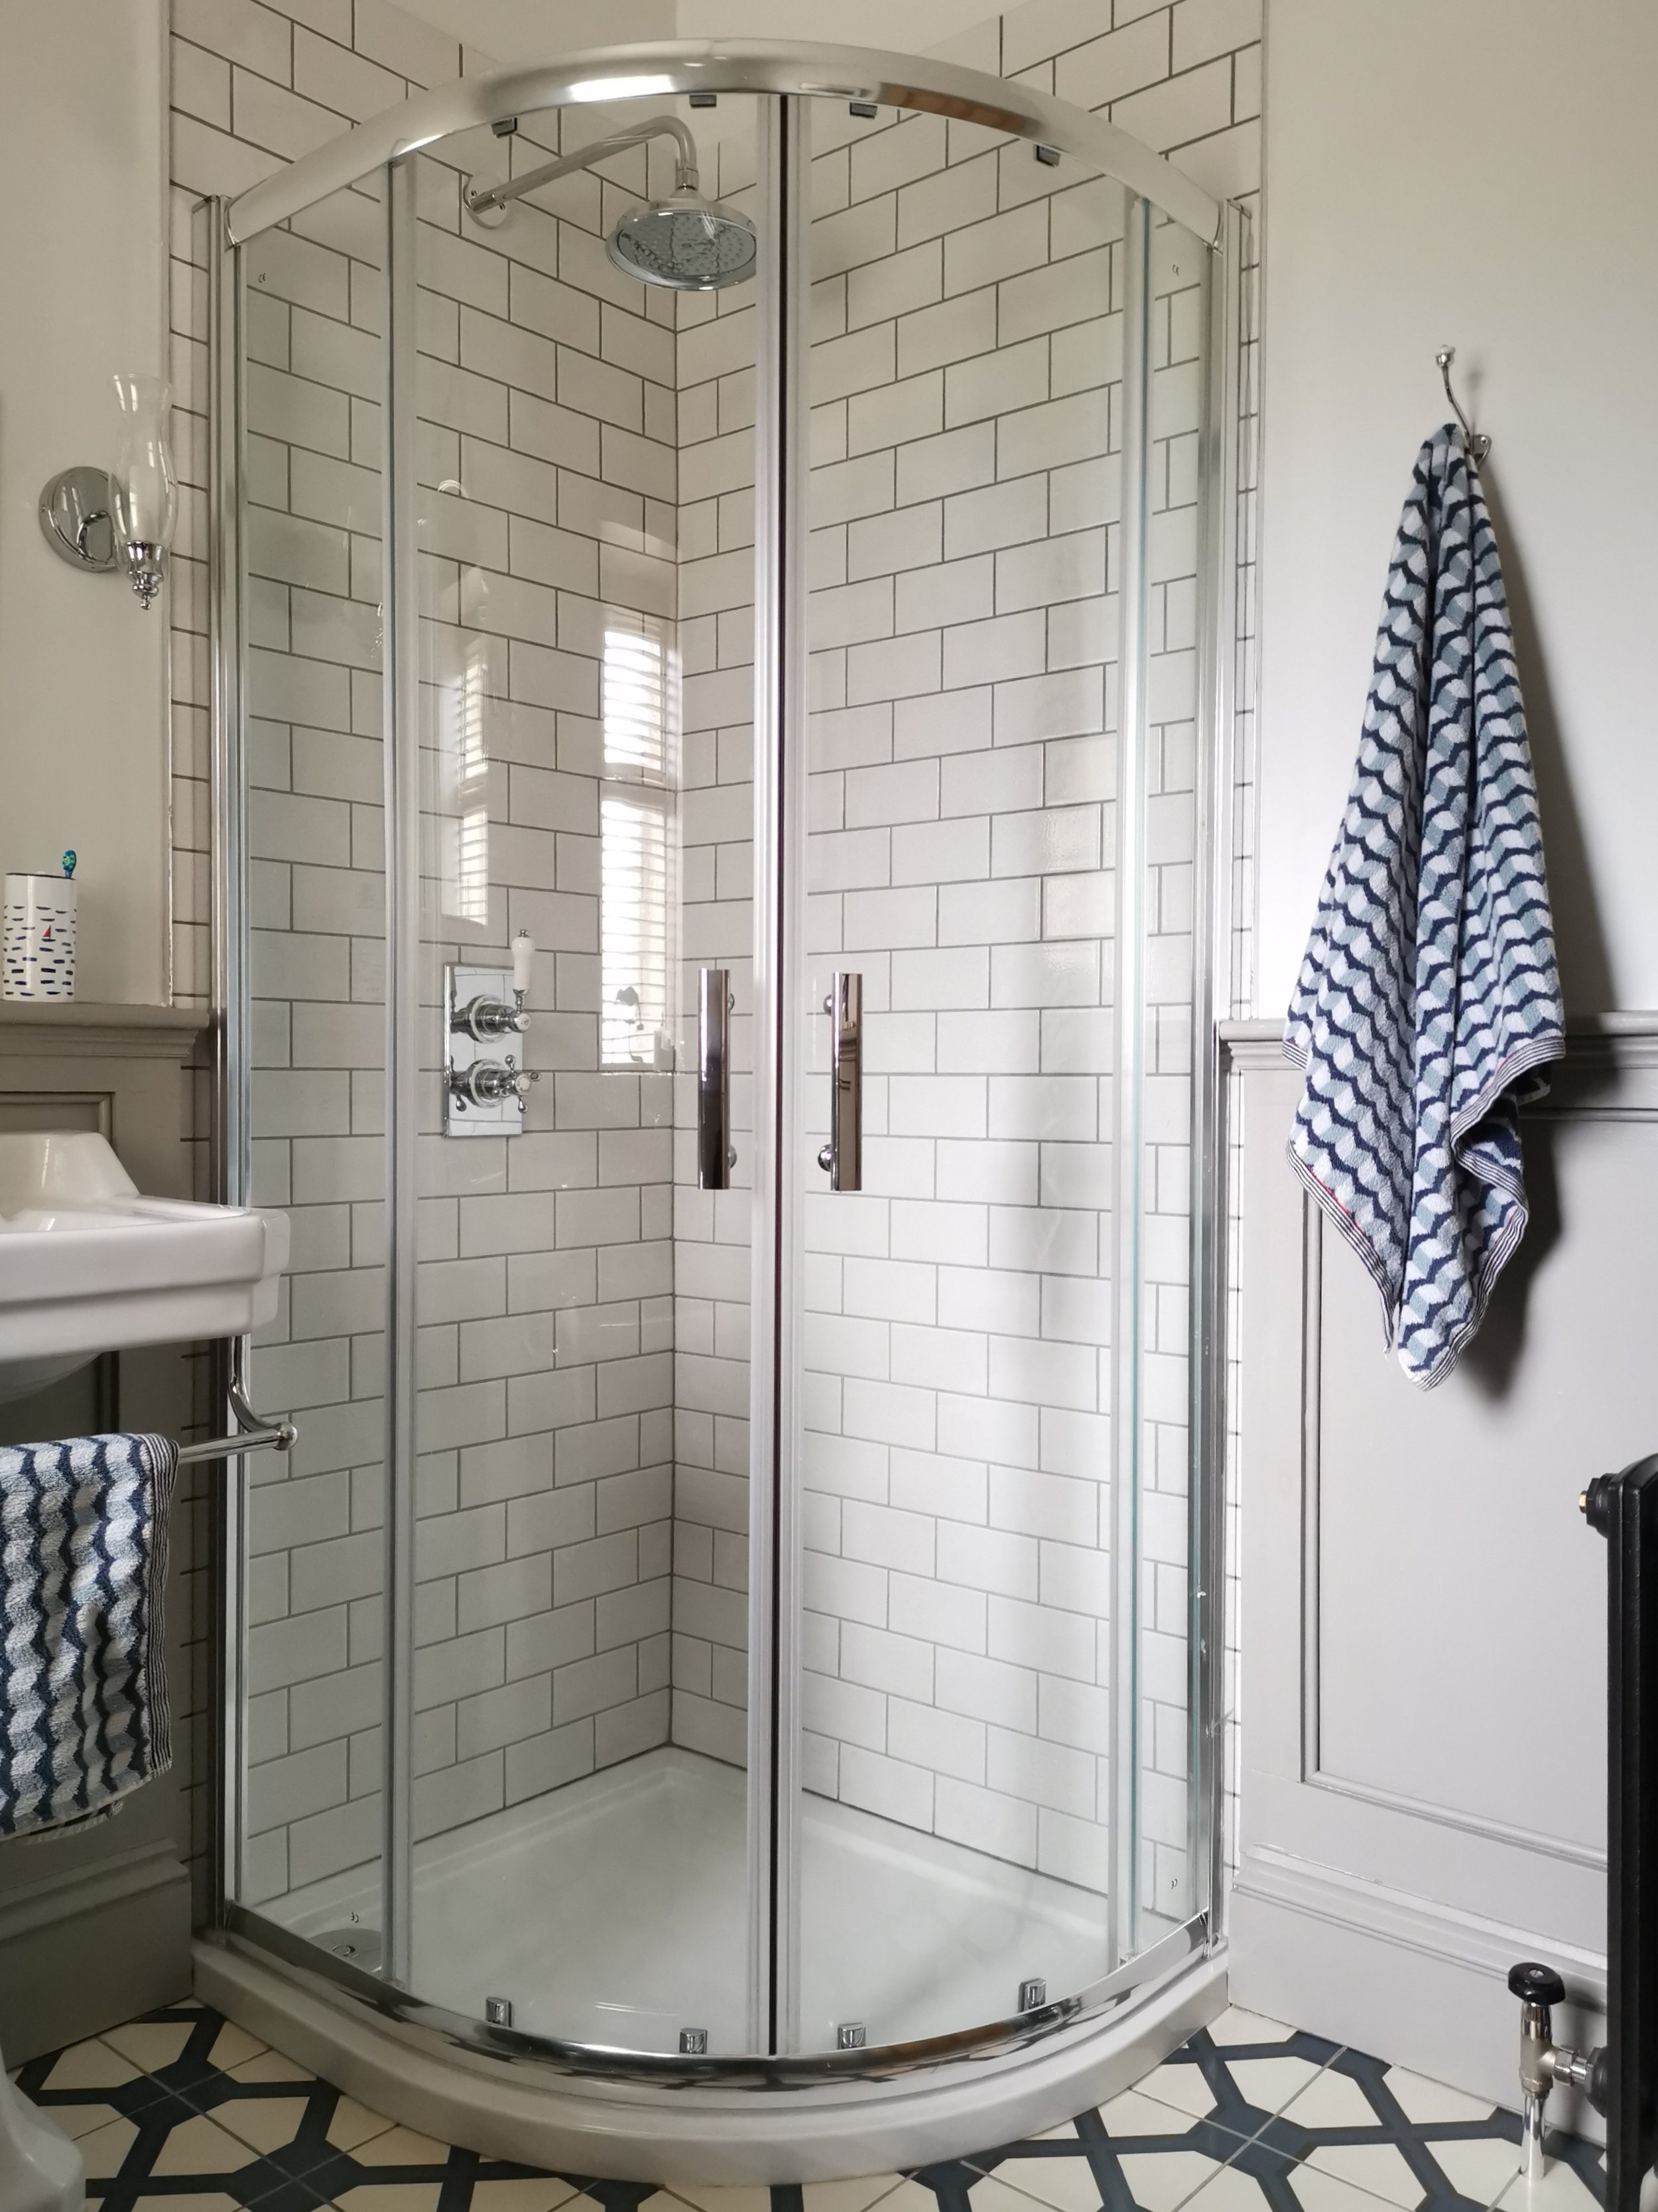
With the space we gained from removing the redundant airing cupboard, we installed a quadrant shower enclosure. This bathroom is mainly used by our two youngest boys so they don’t need a massive shower space. There's a separate toilet upstairs so we didn't need to include one in here which helped with space planning.
The Bathtub

Image credit: Heritage Grand Buckingham Cast Iron Freestanding Double Ended Bath, £2326.32, Sanctuary Bathrooms
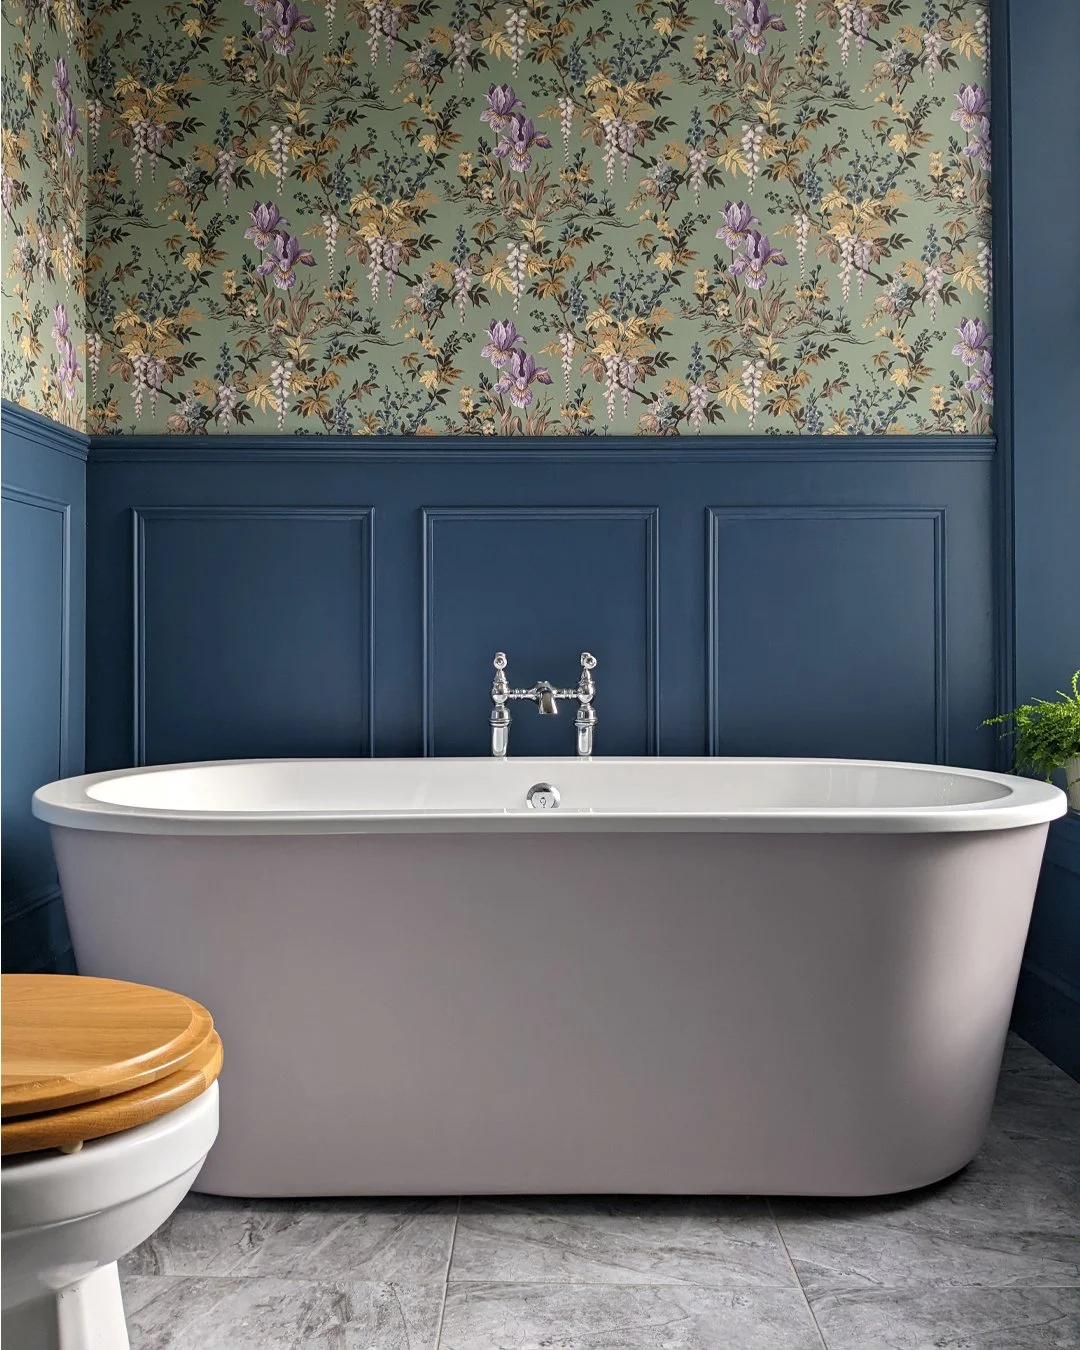
I love the look of a traditional cast-iron tub but my budget just couldn’t stretch to one. The weight issue concerned me a bit too - cast iron baths are very heavy so you have to make sure that your floor joists are really strong. And they can also take a while to warm up especially in a cold room, even when they're filled with hot water. After a bit of research, I decided to find a suitable acrylic bath and paint the outside to get the look of a cast-iron tub in an inexpensive way.
A great way of making a small space feel bigger is to opt for sanitaryware that's wall hung or that's on legs so that you can see more of the floor. I chose a freestanding, claw foot tub - the Burlington Windsor double ended bath which has chrome feet and costs £735 at Victorian Plumbing. A bateau (boat style) bath would also be a great option for a classic look, or you could opt for a more contemporary style. Just make sure the style that you choose has a bit of a lip at the top so that the line where the paint stops is hidden. I wouldn’t go for a contemporary bowl bath, for example.

I was really keen for the bath to be the focal point of the room so we decided to position it under the window. Leaving it white just wouldn’t have had the same impact so I decided to paint it blue to match the floor tiles and to coordinate with the colour of the panelling, which is painted in a colour match of Farrow & Ball’s Purbeck Stone.
How to paint an acrylic bathtub
The process is quite simple but it helps if you’ve got plenty of space, which is easier if you’re using a new bath that hasn’t yet been installed. We painted ours upside down in a different room and carried it to the bathroom very carefully afterwards.
What you’ll need
Acrylic bath!
Masking tape (I used frog tape for my decorating projects)
Paintbrush
Mini roller
Cloth
Medium grit and super fine sandpaper
Primer (see below for which one we used)
Acrylic paint
The Process
TAPE IT UP
If your bath has feet that you don’t want to paint, tape them up. I'm not massively keen on the chrome feet on our bathtub - I'm planning to paint them in a matte black at some point.
SAND THE BATHTUB
Sand the outside of the tub using the medium grit sandpaper, making sure that you cover the whole area that you want to paint. Sanding takes the sheen off the surface so that it feels slightly rough to the touch and it gives the primer a key to stick to. I tend to do this even if the primer says that sanding isn't required.
WIPE THE BATH
Clean away any residue left over from the sanding with a cloth and warm water and leave it to dry.
APPLY PRIMER
Apply an even layer of primer with the mini roller and use the paintbrush for any tricky areas such as around the feet. Allow it to dry according to the manufacturer’s instructions (some need longer to dry than others - find out which primer we used below).
APPLY FIRST COAT OF PAINT
Apply a coat of paint and allow to dry according to the manufacturer’s instructions.
SAND AGAIN
Using super-fine sandpaper, give the bath a very light sand and gently clean away any residue.
APPLY SECOND COAT OF PAINT
Apply a second coat of paint and allow to dry.
Our primer and paint finishes
The colour I chose for our bathtub was Farrow & Ball's Stiffkey Blue, which goes so well with the blue in the floor tiles. At the time of our bathroom renovation, I contacted Farrow & Ball and they recommended giving the bathtub a really good sand and then applying their Exterior Wood Primer & Undercoat, followed by two coats of their Exterior Eggshell paint which is what we did. It's been about five years since we painted it and it's held up so well, with no chips or scratches at all. However, I contacted Farrow & Ball recently and they no longer recommend any of their primers for use on plastic (their Exterior Wood Primer & Undercoat has been discontinued anyway). They suggest using a specialist primer first (see my recommendation below), followed by their Exterior Eggshell or Full Gloss paint. They also suggested using their F&B Wood Primer & Undercoat on top of the specialist primer for colour depth if the bath is to be painted in a dark colour. I personally would skip this step because you can just get a specialist primer in a darker colour instead - saves on time and money!
Bathroom at the Victorian terrace project
More recently, I've worked on an affordable bathroom refresh in my mum and dad’s Victorian terrace where we painted their existing bath. We chose Dorchester Pink Mid by Little Greene, a lovely subtle light shade. Here, we used Bullseye 1-2-3 primer by Zinsser which is recommended for use on plastic. Although it says on the tin that no sanding is required, we gave it a sand beforehand to make extra sure that the primer had a key to stick to. Because the top coat is a light colour, we used their white primer but there’s also a grey option for use with darker paint. Then we painted it in two coats of Little Greene's Intelligent Eggshell. Again, this has held up really well with no chips or scratches.

The end result is a high-end look without the price tag - a great way of breathing new life into your bathroom without spending a lot of money. I've since recommended this as a great solution for clients who have an old tub and want to refresh their bathroom in an affordable way. A quick and easy DIY project!
I’d love to know what you think - let me know in the comments!